Beginners Class Saturday 6th January 2018


Thanks

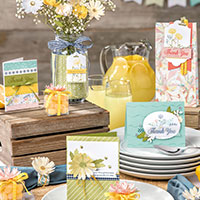
Today the day: I always get excited to see new faces and share the art of stamping.

 If you have never stamp before you can feel very over whelmed.

 So if you would love to give it a go
 
join us Saturday 6th January FREE  Day to see if this is for you...

Call  0409533925 to book your seat, seats are limited to 8 to a group if bring a friend make sure you book you both. Warragul area Victoria


Time 10am to 12noon or 1pm to 3pm
Happy Stamping Teresa

Comments

Popular posts from this blog

Kylie's Monthly Blog Hop Fable Friends Stamp Set

Teresa Brown Stampin’ Up! ® Demonstrator Australia Thank you for joining us for our Stampin' Up!® Demonstrator Monthly Team Blog Hop! We are so happy that you could join us today for this blog hop for ideas and creative inspiration.  We are a group of Stampin' Up!® Demonstrators from around the world that are taking part in training that is helping us to build a successful Stampin' Up!® business and reach some goals we have set. We really appreciate your support. You may be starting here or have come from another blog - either way you can find the link list at the bottom of this post so that you can see every blog post and idea today. Images (C) Stampin' Up! Design Teresa Brown 2020 ...

Let’s Get Hopping

Lets Get Hopping #20 Watercolouring with inks or pencils, colouring with alcohol markers, regular markers or blender pens. What's your favourite colouring technique? This months challenge is to showcase some form of colouring. Theme: Colouring Techniques Add caption Share what you love Bridge Card In this I coloured the bird and flowers with the Aqua Painter and inks The Fabulous Flamingo Bridge Card  I used Aqua Pen and Inks Animal Outing Bridge Card I Used Stampin' Blends So How do you make a Bridge Card Step 1 Select your Card Stock and Designer and Stamp set Step 2 Cut one 20cm x 10cm Step 3 place on Score Board and score 3cm,6cm,14cm, 17cm Step 4 Use a bone folder to fold score lines Some I make in Card Stock and others in DSP but add Card stock to back to help Support the DSP as I have in card below Step 5 Cut one 14cm x 2.5cm to make Bridge at front Check Photos below to help you put your Bridge Card together. Enjoy Te...
Welcome to Stamping with Teresa Today I love to share cards I have made just don’t always to get them up for you to look out hopefully that will change lol. Love these cute Easter Cards.