
Bloghop

Lets Get hopping  #13


Theme: Not your standard card Square, tall and skinny or even a circle, the choice is yours.

I love making square card. So I decided to share one we made at out Cancer Retreat this year.


 Step 1 Base Card: I used Mint Macaron Card and cut at 29.5cm by 14cm.
Step 2 Place the 29.5cm to top of Paper trimmer and sore at 14cm then turn card around and score at 14cn


Step 3 Line up edge of front card on paper trimmer at 2.5cm
Line up the score at the 2.5cm and score down to 11.5cm do all 4 sides.
(May need to turn card over to score its ok)
Step 4 Line up edge of front card on paper trimmer at 4cm.
Line up the score at 4cm score down to 10cm.
(You Can use a bone folder instead of the score tool )
Step 5. Working on the back of front card.
Mark the outside score square with a pencil in each corner.
Line up the two pencil marks to make a cross.
Place on the paper trimmer and cut from top right corner to bottom left corner
.
Should look like photo above.
Fold on all score line using bone folder.
 

Step 6 Cut two 9cm x 9cm in Mint Macaron card stock.
One is for the front of cross and one for back of cross.
(Check photo below which is the back)
Cut a 8.5cm x 8.5cm in DSP for the front which will go over the
Mint Macaron 9cm x 9cm for centre front.
Cut one Basic Black 8cm x 8cm
Cut one Mint Macaron  7.5cm x 7.5cm to stamp out words
From Colourful Seasons Stamp Set.
 

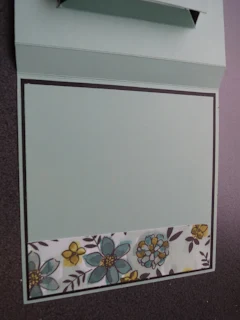
Step 7 Cut one DSP 13.5cm x 13.5cm for front
Line up DSP at 2cm on paper trimmer and push blade down and cut to 11.5cm.
Do all 4 sides the same.
This is the out side border for front of card.
(check first  photo )
Step 8 Cut one Basic Black Card at 13.5cm x 13.5cm for inside card mat.
Cut one Mint Macaron Card at 13cm x 13cm place over the black mat.
(As in Photo 3) and cut a strip of 13cm x 3.5cm DSP add to the right inside card
(as also in photo 3)
 

Step 9 Using the Big shot and Birds & Blooms Thinlits Die .
Cut out some flower from DSP and add to card also add a Clear Face Gem
in centre of flower.
(Add to card As in photo one)

Happy Stamping Teresa

Check out the amazing ....... Nina Mc Millan
https://ninassouthernaccents.blogspot.com/2018/09/letsgethopping13.html


Comments

Jenn said…
So cool Teresa! Looks just like a framed piece of art!
SylviaM said…
Wow, that’s an awesome card. What a clever design.
Tan said…
Wow Theresa. What a clever design.
Card Bomb said…
This is such a cool card! I love the frame!
Eva Pottsova said…
that's a great design! Lovely project, thank you for sharing.
Diana Tillery said…
I thought this was a home decor piece instead of a card! SO pretty!! TFS! 😃
Tracy Bish said…
Very Clever Teresa, will have to try this, thank you for the detailed instructions.

Popular posts from this blog

Let's Get Hopping Round 9

So our challenge for May is to create a set of cards, a set of 3 or 4 cards that compliment each other. Let’s Get Hopping, Round #9 Thank You Tanya Rees Today I decided to go with Flying Home Stamp Set from our Stampin' Up! Occasions Catalogue 2018 and Added Teeny Tiny Sentiments Stamp set from Annual Catalogue for this project. You can see all products From my On Line Stampin' Up! Store Here Happy Anniversary Card its simple but sweet. I have used our Note Cards and soft Sky, Whisper White Card Stock Big Shot and the Softly Falling Embossing Folder, Ovals Die added Metallic Edge Ribbon Berry Burst (OC Pg13) Using Stampin' Blends to Colour used the window punch (NA)    Happy Birthday Card Just love the little birds. I have used our Note Cards and soft Sky, Whisper White, Old Olive Card Stock Big Shot and the Softly Falling Embossing Folder, Ovals Die Using Stampin' Blends to Colour used the window punch (NA) Leaf Punch Carried over f...

Kylie's Monthly Monthly Blog Hop April 2020 Grace's Garden

Teresa Brown Stampin’ Up! ® Demonstrator Australia Thank you for joining us for our Stampin' Up!® Demonstrator Monthly Team Blog Hop! We are so happy that you could join us today for this blog hop for ideas and creative inspiration. We are a group of Stampin' Up!® Demonstrators from around the world that are taking part in training that is helping us to build a successful Stampin' Up!® business and reach some goals we have set. We really appreciate your support. You may be starting here or have come from another blog - either way you can find the link list at the bottom of this post so that you can see every blog post and idea today.  Today I am using the Grace's Garden from our amazing Mini Catalogue Jan - June 2020 Click on the link for product and Instruction on how to make  Click here I have also include lots of photos to help you along the way. To get measurements click on the product and Instruction link above  S...

Last day kit sale up to 30% off

Shop here   Product of the Week: All-Inclusive Kits ON SALE! 🎉 For the next 3 days only, all of our all-inclusive kits are up to 30% OFF... even the newest releases!! These kits come with everything you need: pre cut pieces, supplies, and step by step instructions. They make the perfect gift for friends, a fun girls night activity, or just a little creative “me time.” 💕 Don’t wait... grab your favorites (and a few extras for gifts!) before the sale ends! 🎁 Shop the Kits on Sale Last Day Wednesday 8th October  🦋 Teresa Brown – Independent Stampin’ Up!® Demonstrator 📱 0409 533 925 🛍 Shop Online: https://www.stampinup.com.au/?demoid=4000208 🌸 Join My Team: https://www.stampinup.com.au/join?demoid=4000208